
For an overview of EQ to QuickBooks compatibility and data that can be exported from EQ and imported into QuickBooks Online see this article.
Exporting sales invoices/credits
To follow these steps you will need to have raised at least 1 invoice or credit note for a sales order. See sales invoices overview. You may also want to export your customer list so that your customers and same account codes exist both in EQ and QuickBooks. See export customers (csv).
1. Within EQ open Projects > Invoices
2. Use Filter List to apply filter criteria, for example invoice dates.
For subsequent exports you will likely want to include the option Exclude invoices exported to accounts as shown below. This will ensure you will only export each invoice once

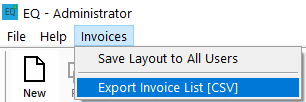
3. Once you have filtered your list, click Invoices on the top menu bar and pick Export Invoice List [CSV] as below:
The first time you export you will need to select the fields you want to export. Follow the steps below to select the commonly used fields. You may adjust these to suit your purposes:

a) Tick Include Header (ticking Open file after export is optional, if you would like to see the data before importing to Sage)
b) Tick Flag as Exported to Accounts (so next time you filter, EQ knows which invoices have already been exported)
c) Optionally select a milestone from Complete Milestone. (Setting a milestone will add visibility on your sales orders screen and enable you to filter by invoices sent/not sent to Sage. See milestones article).
d) Tick the fields as per the list below, setting the Header and Sequence exactly as the list below.
QuickBooks allows for third party applications to help import CSV files. That software may have the ability to import more fields. Refer to your importing software's help. For additional information on importing into QuickBooks Online see their help article on Exports/Imports (Online) here.
These instructions presume a common format for QuickBooks but may be adjusted if you are instructed in other compatible files by QuickBooks support or documentation. Note that these fields make assumptions about how you will show your data in QuickBooks.
| Field Name in EQ | Header for QuickBooks | Seq |
| Invoice Date | Date | 1 |
| Invoice Total | Amount | 3 |
| Order Ref+Invoice/Credit | Description | 2 |
(To find Order Ref+Invoice/Credit you will need to scroll down the list of fields a long way)
Note on 'Fixed' fields. (They are not required for this format). These are blank fields where you can either leave empty to create a blank column on the export file, or enter some text which will always appear on every line, e.g. qty is fixed to 1.
5. Under Export To click the ... button to select the folder on your PC or network where you need to save the export file.
This is what a sample export csv file will look like when viewed as a spreadsheet: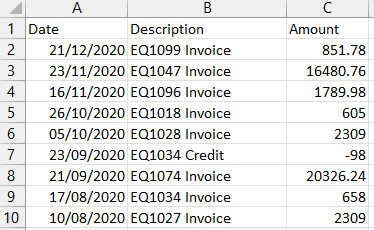
You have now completed the sales invoices/credit export, ready to be imported to QuickBooks Online.
Once you have generated the CSV file successfully, you should follow the QuickBooks Online instructions for importing a CSV file.